Wednesday, 4 January 2012

Who needs glue?

Nearly a month since my last blog but that doesn't mean I haven't done any work on R2.
My goal was by Christmas to have R2 able to stand up unsupported as long as no-one touched him. This wasn't achieved however because of school holidays - yep I had to stay indoors where it was warmer and annoy Skye. To cut a long story short, Skye was not feeling well the week before xmas and ended up having an emergency appendix operation on the 23rd December. She was discharged from hospital on Christmas Eve and is back to her annoying self. Anyway, while she was in hospital we decided it would be good to take R2 round the childrens ward when he's finished as a thank you to the staff and to cheer up the children. This adds a bit more pressure to make him look even better now - gulp!

I've digressed enough now and back to the build. I managed to escape the house for a few hours and headed to the garage where the 2nd foot was built to the same stage as the 1st. This meant R2 could stand unsupported and photo time. The obligatory photo of a persons head behind R2 was also taken.


Skye with the compulsory picture


Due to my shift pattern at work, I have managed to fit in another few hours in the cold garage. At one point I was wondering how I was going to get my lunch without getting wet as the rain streamed down. Then it eased and my worries were gone.
I was now cutting the 1mm HIPS. WOW!! how much easier is this to cut and snap than 3mm? This stuff is really, really  nice to cut. The 1mm parts for the legs were cut out oversize in order to give enough material to trim up. After checking for high spots the strips going around the tops of the legs were glue on and held in place with tape. Only 1 strip on each leg at the moment though.


2nd strip taped in place.Who needs glue?
The next day after these had dried the 2nd strip was added and again held in place with tape.

Slot bits drying - hopefully!


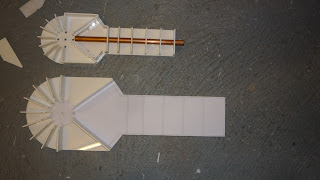
There is so much tape around these sections that its a pity glue is applied. While these strips were drying a trim of the slots and a file of the angle bits and another part of the legs are covered in 1mm.


While in the garage I played with some filler called Milliput. It was bought from a local railway model shop and has some excellent uses and only cost £3. Once mixed by hand like dough it was put in a few places on the feet and when set can be filed, sanded, drilled, tapped etc. This could be my saviour if I'm going to display at the hospital. I'll let you know how this part goes.


The magic of Milliput?


I'm back at work tomorrow, and I had best start studying for a couple of exams in 8 weeks, so the build may be a bit slow. But while studying on the laptop I could start playing with Picaxe programming now I have the stuff - hmmm!!!

Gosh! Nearly forgot Star Wars on blu-ray - absolutely fantastic. Although Skye did threaten to destroy the discs if I kept saying quoting lines before the actors. Obviously I humoured her - for a while

Friday, 16 December 2011

Brrrrr!!! Its cold out here!!

Well, as you can guess from the title I've been out in the garage doing a few more bits to R2 and the weather is a bit cold. Even had a little snow this morning!
I have now completed the second leg and ankle, rounded the shoulder hubs off together - so theoritcally they should be the same size (!!!!). The legs have expanding foam in them to give a bit of weight and support - it may stop the hollowness when R2 moves if theres any?

And today it was starting on the other main foot. I had to keep coming indoors every half hour just to warm the fingers up. If it carries on like this I may have to put on warmer clothes than the shorts!


2nd foot underway

My plan is to have the second foot done by Christmas so that R2 can come inside and celebrate with us standing on his own. My presents from the in-laws turned up today and I couldn't help have a peek at them - a set of Jaycar motors (they are so small) and some LEDs.
My step-daughters fiance will be making the adapters for the wheels/motors next week. Ready to put on after Christmas.
The LEDs will be for Skye and me to start playing about with programming using the Picaxe board etc, that the in-laws have got me. This will hopefully get Skye involved as we get the LEDs to flash at different rates, operating servos etc. It will be all new to me this electrickery stuff so we should both learn something (Skye more than me, probably)
The bits so far.
The understanding wife has ordered me a set of aliminum skins from Deetoo on the UK R2 Builders forum - but it looks like they will be after Christmas.
Florida is booked for next year whilst Star Wars weekends are on - yippee!!!

If I don't blog any more

have a Merry Christmas and prosperous New Year everyone.

May the force be with you.

Saturday, 10 December 2011

Fantastic

Well, the build has been on a go slow recently, due to the time of year. Dashing here, popping there putting the lights up outside etc etc...
Today has been a good day - approx 4 hours in a cold garage with some classic Chas n Dave belting out. I'm not sure but the singing along may have kept me warm.
Anyway progress on the right hand foot continued and a mock up of ST-80 standing on 1-leg.


This was followed by cutting out the parts for the left leg, nearly ready to start the progress again. I wonder what I would be working on if the original legs were scale size and not 75%!!!!!

I've got Monday and Tuesday off work, so in theory I have 2 full days working on it - but the vibes I'm getting from the wife says different. I shall have to try the Jedi mind trick on her.

I am not going to put any 1mm plastic on the legs etc until I have the wiring and motors in, just in case. And I've looked at the link James gave me and now I'm toying with putting sensors in the feet to avoid potholes, stairs etc. 
All those people out there coming up with these fantastic ideas does make it hard for those of us who are in a hurry to build it. But fantastic stuff though well done all.

Thursday, 24 November 2011

A photo fo Skyes Land Rover I built for her. LED side lights, brake lights, indicators, speedo, battery meter, forward & reverse gear lever. 24v mobility motor and suspension. Carries us both to school and I drive home.

A Nightmare in the Garage!!!!

I was thinking a shift off work would result in massive moves on the building front. It has and it hasn't so let me tell/bore you with it.

The ankle plans were cut out and started to put together, except for the top cover. this is because I was toying with the idea about putting a tie rod in to keep the foot flat when in 3-leg mode. Whilst doing this I noticed that the groove on the leg was only just above the ankle - this made me look at pictures of R2 and see if this was right. The leg also had a MASSIVE amount of room when in the ankle - surely that can't be right!!!

Oh! Woe is me!

That evening I nervously opened the laptop and file containing the leg plans. View magnified to 100% and a ruler showed about 15ish cm from leg bottom to the groove. A quick "Don't anyone touch the computer or else" was shouted to anyone listening - pointless really as even my daughter (assistant) ignores me - and out to the garage to check my measurement. "Nooooo!" I had 12cm, somehow I had cut out 2 legs at approx 75% size. A bit of a sulk that night and the next day back out cutting the styrene at 100%. The difference is unbeliveable.
Little & large

Before I carry on with the leg, it was time to build a shoulder, so improvised circle cutter to the ready and away I went. This was so easy and in no time at all the right hand shoulder was finished.

Dry by morning.

A foot was then started, mainly to get the ankle onto while I worked out the tie rod for it. This was bolted to the ankle to help alignment etc. and then a bit off research over a bowl of soup at lunchtime. This revealed that no-one on their blogs has mentioned a tie rod, so just to get the build going I opted not to work it out and thus rebuilding the leg started again.


That looks better!


Deja Vue?

Its just a matter of finishing this leg and foot and repeating the whole process for the left leg but at least he will be a better size.

We have even thought of a name for our build, not too sure if its a droids name but ST-80. ST from Skye's initials and 80 from mine (AT). I have told Skye that have to personalise it if we use this name to make it different from R2.

Monday, 14 November 2011

Revamped Shoulders & a bit of leg

A day off from work, and instead of cleaning the windows I opted to spend the time in the garage working on R2. ( The wife hasn't noticed the windows are still dirty - yet!)
I cut out the modified shoulder plates as per Dave Everetts mods, and drilled the holes out to 6mm. I then had the idea of using some plywood and mounting the router underneath to make the slots. (This has been done by others who follow Dave's plans.)
It worked a treat.
The shoulders were then glued in whilst I start glueing the leg braces etc.
New shoulder plates - hopefully right way round!!
 
I clamped all the braces together and filed square. Then with a 12mm drill in the bench drill, made the hole through the middle for the wire tube. I was using a piece of 15mm copper pipe as the tube, and didn't have any bigger drills - Hmmm!
Then in my one brainwave of the week, I remembered I had a step drill (?) this had a size of 15mm. Fantastic. The only problem was I would have to drill the braces individually.
This done the tube pipe was put in and glueing started, ensuring they were all square of course.

A spot of luncheon and a cuppa left me ready to carry on.

The legs shoulder braces were filed to shape - a small square out off a corner, and then more glueing. This was a tricky bit, as trying to keep them square involved masking tape for the first time. It wasn't to stop me singing along to the radio as the neighbours may have wished but to hold the braces square while the glue dried in the lovley damp, cold winter air of the garage!!!
Weights to hold the position
Must clean the floor soon!!!
This will do for the day, and so inside to cook dinner, bath Skye and update the blog. Followed by sorting out my R2 files, what plans need printing, sorting out skins and a dome for my xmas present. Its a busy life at times isn't it?

I reckon another update before the weeks out though!


Wednesday, 9 November 2011

Redesigned Shoulder plates - Thanks

The frame was all together and looking good when Dave Everett (who's plans I'm using) decided to update the plans on R2 builders club site. He has made the shoulder plates on the frame with slots to enable R2 to change from 3 legged to 2 legged - albeight manually at the moment.
With this news it was with heavy heart that I had to think whether it was possible to modify the existing in-situ or try and get tehm out and make new ones. I decided on the latter and with knife in hand first one side then the other came out.

Shoulders removed.

The next problem was how to print out just these shoulder plates when they are on the same plan as a body ring!!! A bit of playing about on the computer and printer settings enabled a 'current view' print to work.  YEE!!HAA!!
A spray of the repositionable glue on to the styrene and a few slashes with the knife and both shoulder plates and support plates cut and drilled.
That was easy - just-!!

While I decide whether to make another top ring with a support for the slip rings, I thought it would be nice to start on the legs. The legs will probably have to be re-made or modified in my quest to make R2 change stance on its own - (unless Dave adds the modifications soon)
The legs inners are made from 3mm styrene and so the plans were stuck on and cut out quite easily actually. This must be sign that I'm getting better or its an easy part to cut out - probably the latter. It was then time to go indoors and spend some time with the wife (she who holds the budget must be kept sweet. LOL). Hopefully on Saturday before working on nights I'll be able to cut out the 4mm square on 8 small pieces of the legs and drill the holes for the electrics, maybe even get the other leg cut out.

1st leg nearly done

I may even see if Skye wants to spend half hour in the garage on Saturday to hinder/help.